DIY: Roof Top Tent Compression Straps
I bought a Tepui Tents Autana Ruggedized Roof Top Tent (RTT) two years ago for a trip to Alaska, and I've had few complaints. It's well made, comfortable, and practical - for the right conditions. If I was allowed to have the manufacturer make one simple, significant improvement, it'd be the use of a better compression strap system for when it's stowed. The current hook & loop webbing doubled over through a D-ring isn't very good when new, and as the hook & loop wears, it becomes less effective as tugging on opposing straps makes the one on the other side of the RTT come loose. The straps are also bulky and long, which complicates cover fitment.
The OEM straps also use chunky blocks of plastic for attachment to the frame, which interferes with the cover zipper. It's frustrating to have the zipper running nicely until it reaches one of these plastic roadblocks. I'm sure a fair amount of Utah dust didn't help, but I recently damaged the cover zipper due to this unnecessary bulge forcing the teeth apart. What's odd is that the long cover straps that go over the cover are anchored by thin pieces of aluminum that are riveted to the frame. I guess the compression strap anchors are designed for easy replacement, but if the things were made better, they'd last much longer.
These straps have become an annoyance when stowing the tent, so it was time to address the problem.
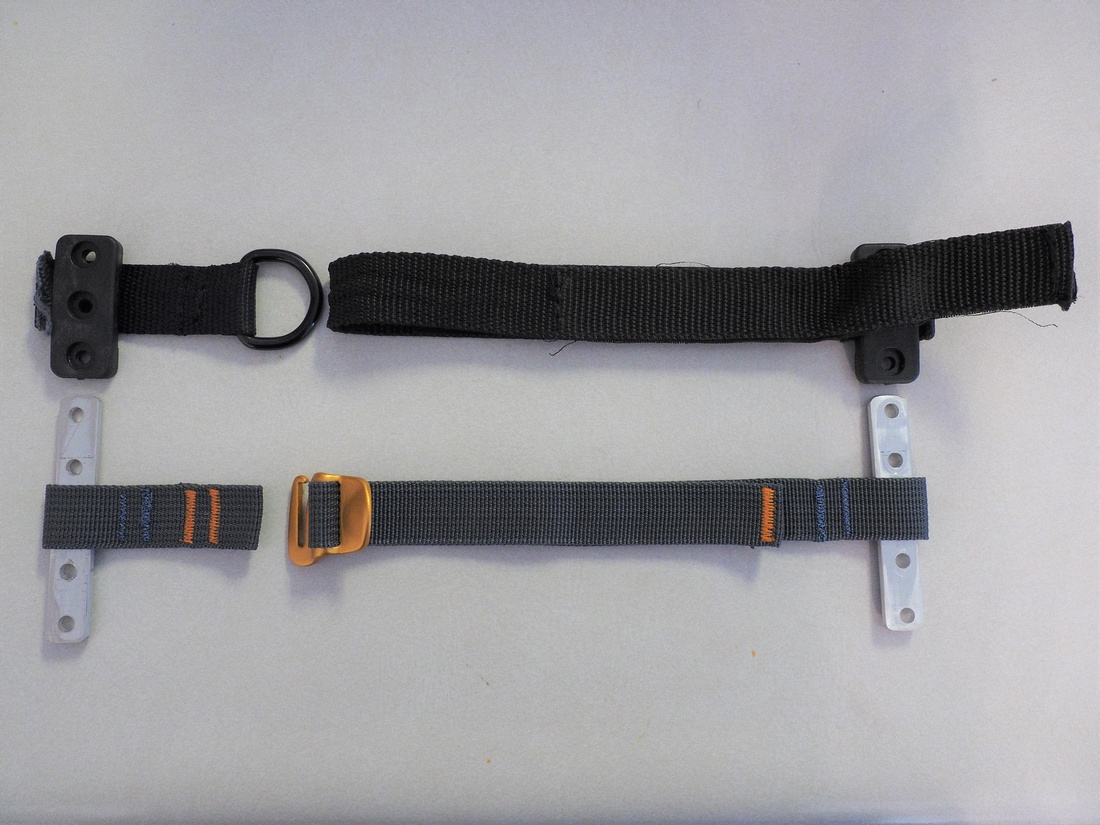
 I modified four Sea to Summit 20mm Accessory Straps with Hook Release for use with anchoring plates I made from 1/8" x 1/2" aluminum bar stock.
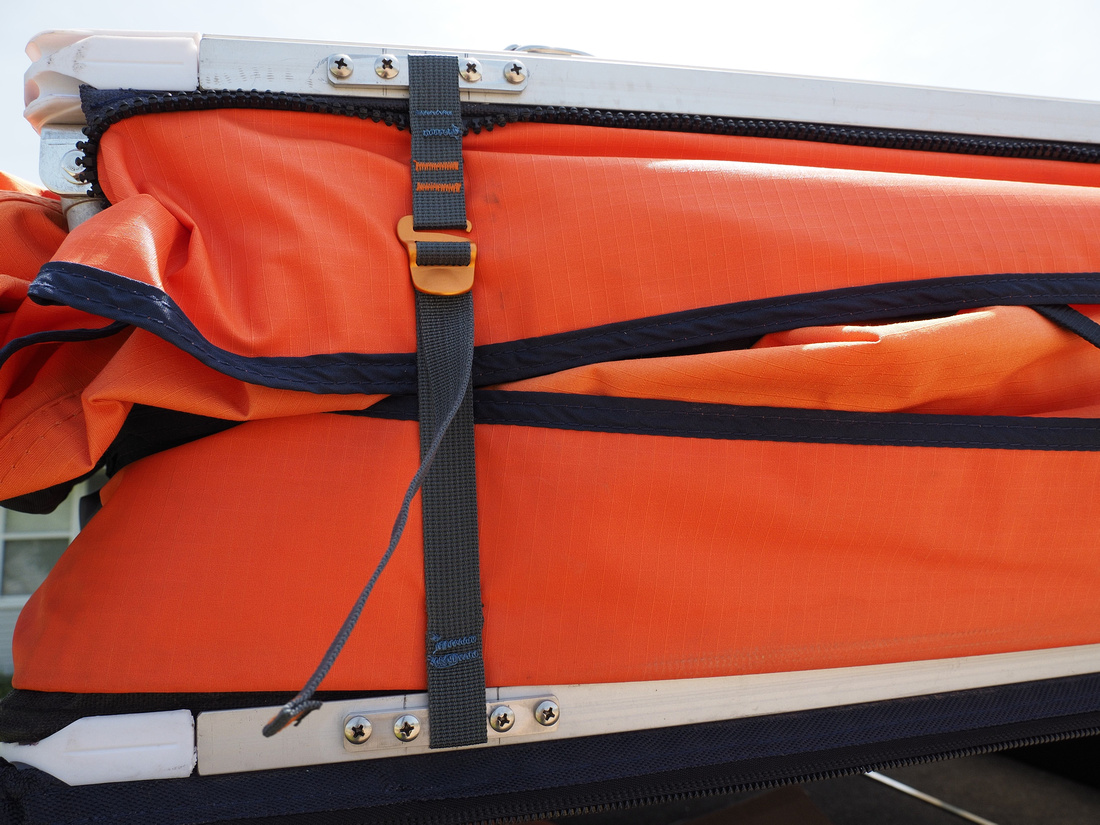
The new straps have much slimmer anchor blocks, resulting in less interference with the zipper.

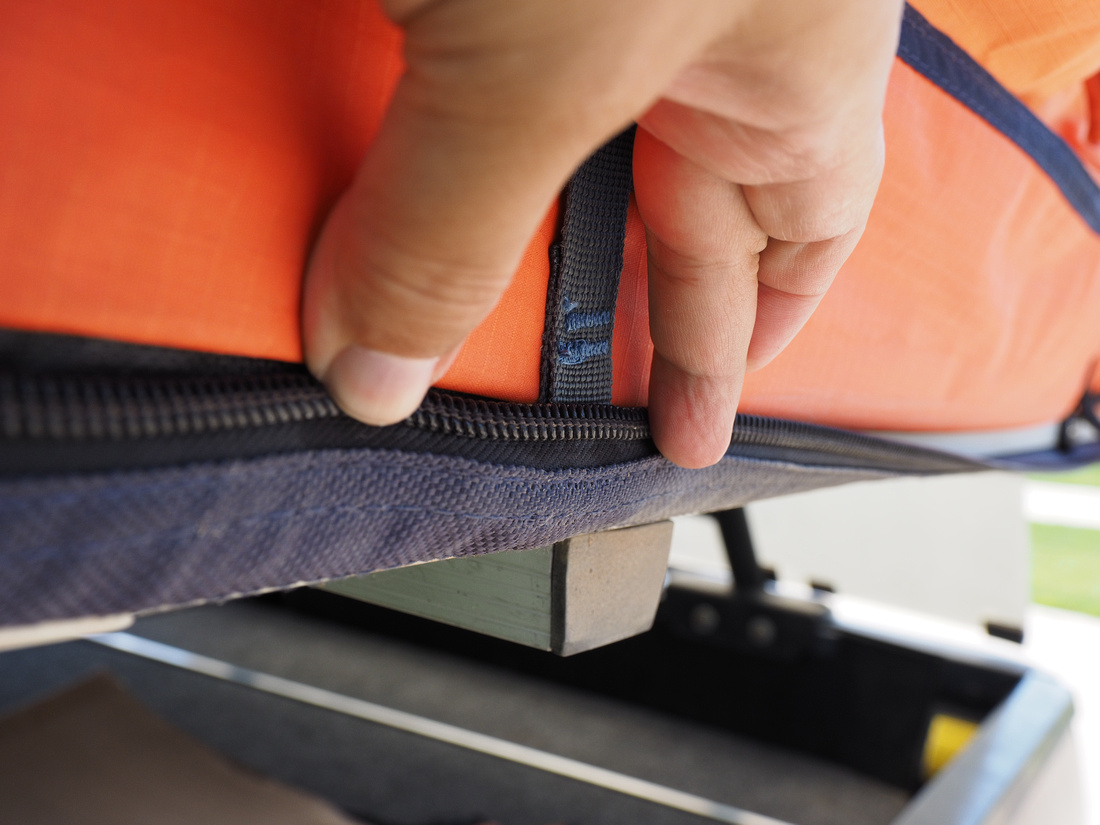
Now for the OEM straps. Note the damaged zipper tooth I massaged back into service. The thick, plastic anchor blocks protrude too much.


For the new anchor blocks, hole size and spacing may vary enough between tents that I recommend using the OEM plastic anchor blocks as a reference. Unlike the three hole design, with a center screw running through the webbing, I opted for two screws per side, with the plates being 3 1/4" long. This allows for the use of wider webbing if the Sea to Summit straps ever fail, and it still allows the use of two of the OEM holes. I prefer keeping the hole count to a minimum. Once the drilling and cutting is complete, deburr the new anchor blocks.
When drilling the blind pilot holes in the frame, I determined that I'd reached the proper depth when I felt the bit break through a small gap in the frame, which I could see was done with the OEM holes. When you drill holes in the frame, make sure the chips don't spin around and flail the tent fabric or zipper. Even though they're aluminum, they can cause damage. Clean up all of those chips, too. You don't want them to be trapped in the skirt fabric, leading to a fouled zipper or chips in the bedding.
The OEM screws are stainless steel #10 x 1/2"round head sheet metal screws, and since my plates use two of the original holes, I continued to use that size for the new screw positions. I drilled 11/64" holes for the screws, and added a few drops of Rapid Tap cutting fluid to aid the threads in cutting through the aluminum frame material. I tried 9/64" first (common recommendation), but even with the cutting fluid and turning them by hand, the screws bound up and the heads snapped off. Running SS screws against the aluminum causes thread galling, so if you intend to do the same, use some kind of cutting lubricant - even a light penetrant like WD-40 or beeswax will help. Also, run them in with a screwdriver, not a power tool.
Since there's little forgiveness at this screw length in aluminum, you may want to try a test hole with your drill bit and screws. There's not much difference between too big of a pilot hole (stripped threads) and too small (broken screws).

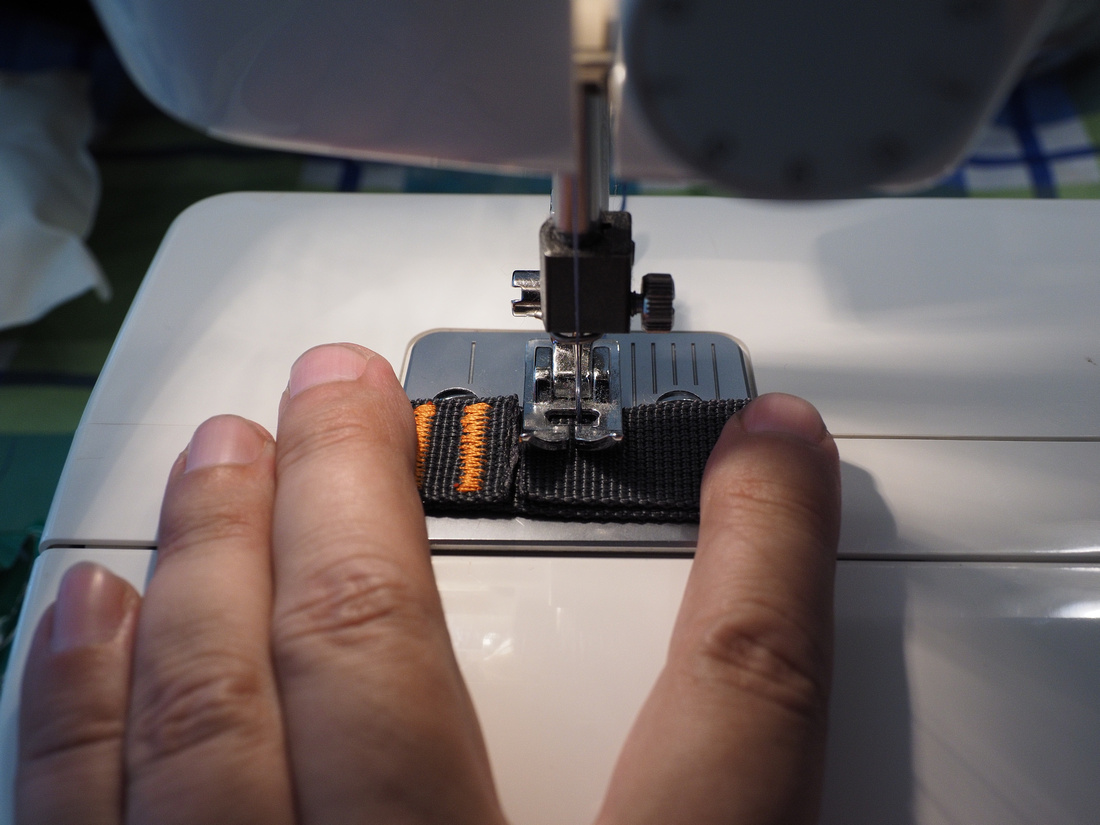
For the straps, I cut the end that already had a double bar tacked loop, and doubled the free end to create a double looped piece of webbing - one loop for the anchor point, one for the buckle. I lightly singed the webbing cuts before sewing. I used a sewing machine with a heavy, 100% nylon thread, and a narrow, zigzag pattern. After a few false starts, I was able to run the machine very slowly while feeding the webbing by hand - the feed mechanism wasn't able to pull the webbing effectively on its own. A single forward and reverse pass created a good bar tack, and I added a second for insurance. My blue bar tacks aren't as pretty as the orange Sea to Summit ones, but they should hold well.

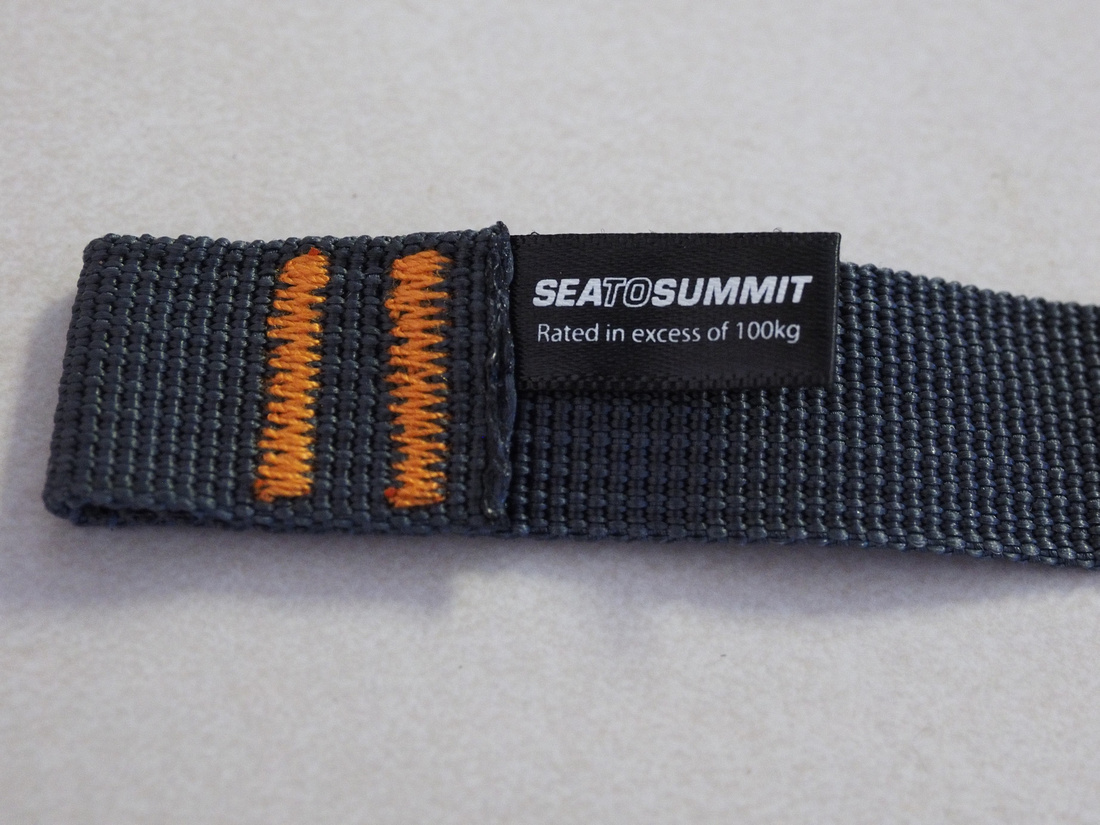
A note on these straps. I saw them advertised as having steel buckles and a higher load rating, but Sea to Summit lists them as aluminum at 100 kg, which is correct. Sea to Summit doesn't have any steel buckled straps, so if you see them listed as steel somewhere, don't be surprised if they aren't. Also, I used the 20mm (3/4") version, not the 10mm straps. I don't believe the narrower version would work as well.
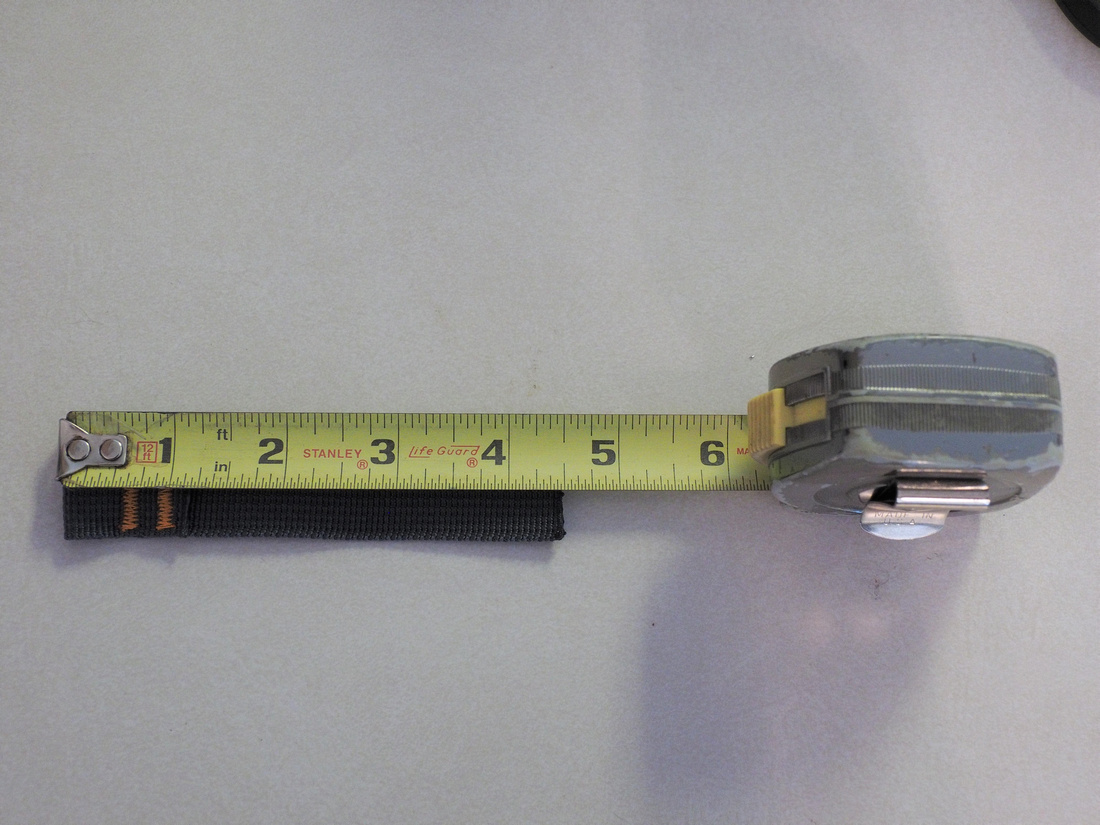
 I pulled the buckle to the finished end, and measured 16" to make my cut. I folded the webbing at 14", and made another double bar tack loop for the lower anchor point. This length worked well for my RTT, as it allows enough slack for a decent grip on the webbing before compression, but doesn't leave a long tail to get in the way of the cover zipper. Other RRTs may vary in thickness when folded; adjust accordingly.

Once you figure out what's going to work, it's easier to replicate the parts so that they all match. I'm sure someone handier with a sewing machine could do a better job, but mine didn't care for the thick, slippery webbing, so I resorted to manually turning the handwheel for better control.
 Sea to Summit rates the straps & buckles at 100kg, which for me, means I can lift myself off the ground by the strap and still not exceed the rating. As long as no one is bouncing on the top or yanking on a strap, they should never fail due to an excessive load. I really like how easily they release under tension, which can be a problem with some buckles or D-ring solutions. I'll keep an eye on the webbing for wear, but I believe these will last a long time.
I may add another pair of straps to the side opposite the hinges, but I'm not sure there's much more compression to be gained. They might relieve some of the stress of the two far-side straps, and add some redundancy to the compression system where it's needed most.
I hope this helps others improve their RTTs and avoid the zipper damage I've experienced. The materials cost around US$30, but if similar buckles could be sourced individually and generic webbing was used, the project could be done for less. As for the sewing, it could be done by hand with a heavy needle and thimble, but it'd take some time to do it right.
I'll report back on how they worked after my next trip.
